
How to Install Vinyl Plank Stair Nosing: A Simple DIY Guide for Beginners
Ever stood at the edge of a staircase, wondering how to make it both safer and more stylish?
That’s where vinyl plank stair nosing comes in it’s one of those small details that makes a huge difference.
When I first started my DIY journey, I had no idea stair nosing even existed, let alone how much it could elevate the look (and safety) of a space. If you’re just getting started, don’t worry you’re in the right place. In this guide,
I’ll walk you through everything from choosing the right stair nosing for vinyl planks to installing it with confidence.
Ready to turn those bare stair edges into something sleek and secure? Let’s dive in!
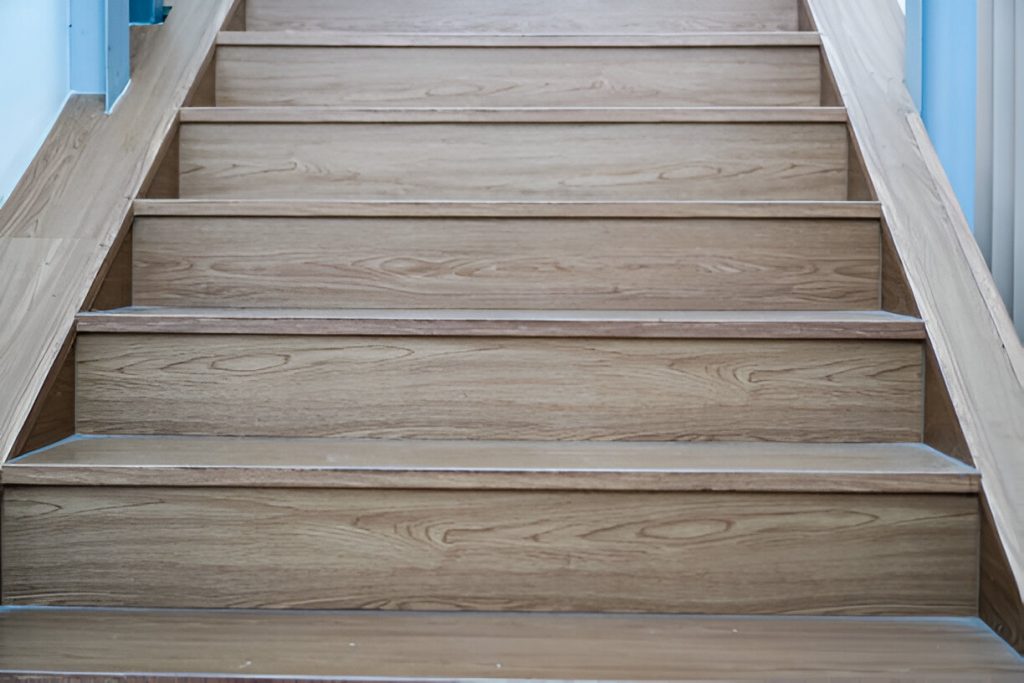
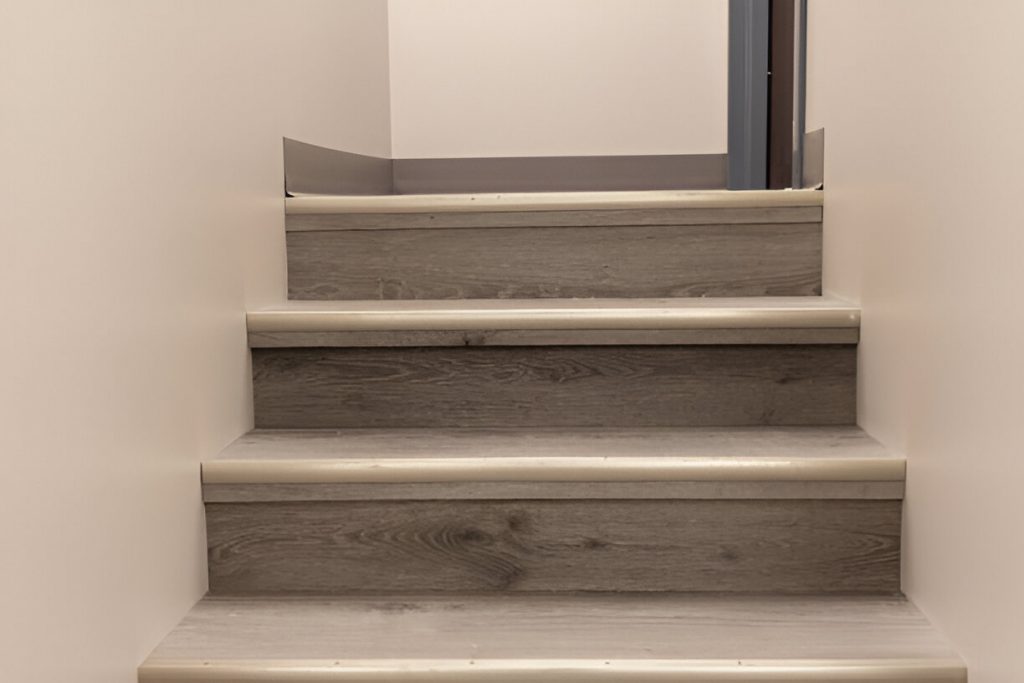
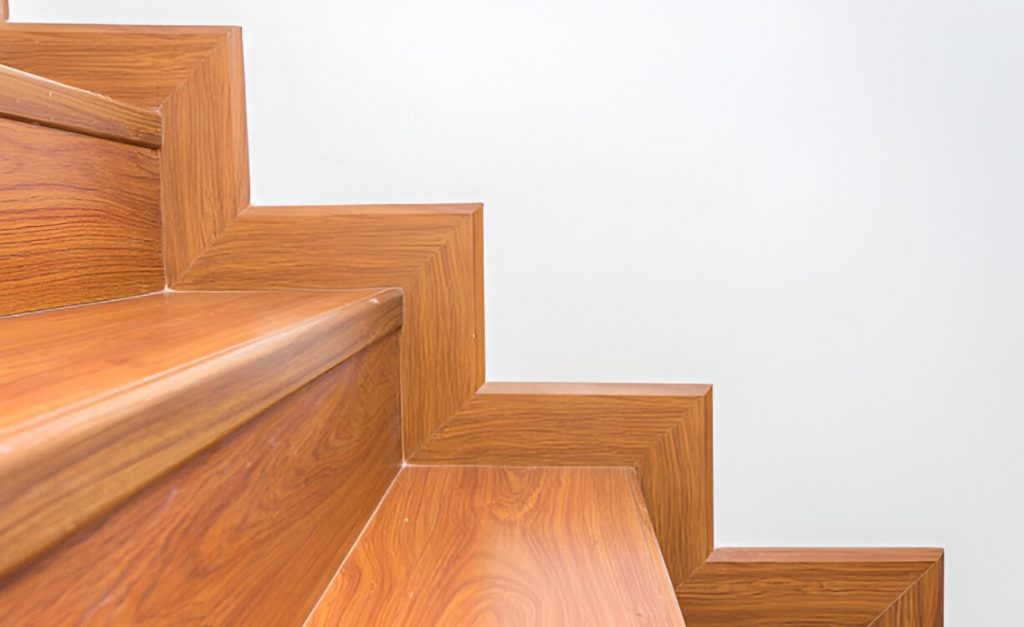
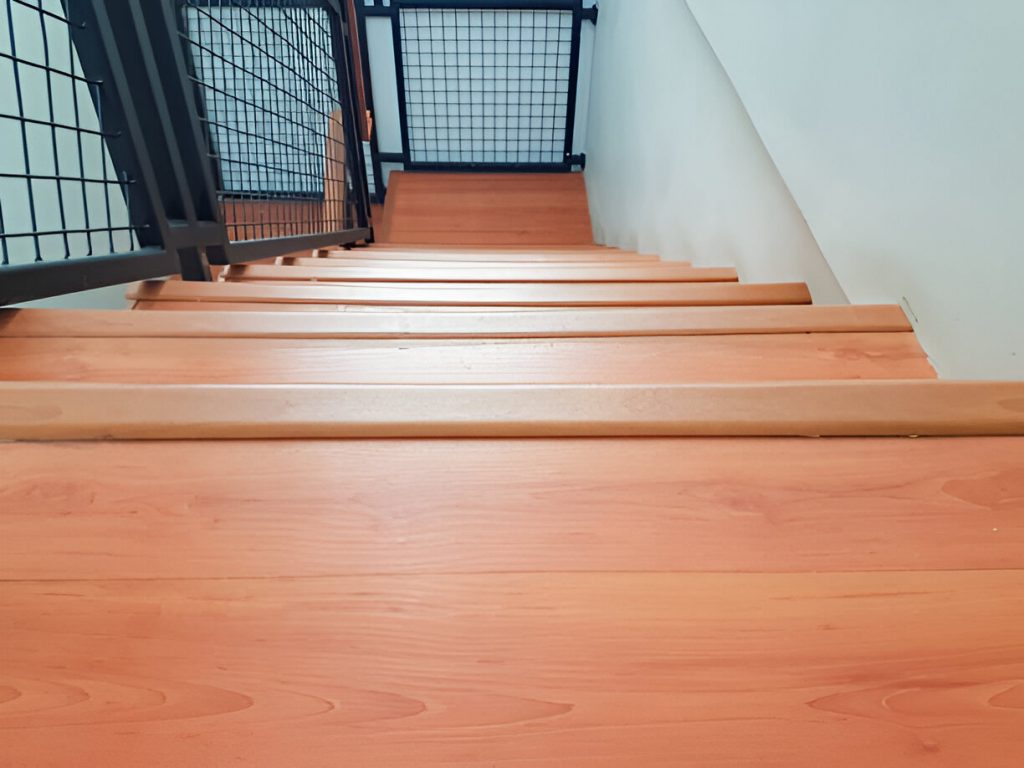
What Is Vinyl Plank Stair Nosing?
Let’s keep it simple. Vinyl plank stair nosing is a piece that goes on the front edge of each stair. It covers the gap where the plank ends and gives the step a nice, clean edge.
But it’s not just for looks. It also helps stop slips and keeps the edge from wearing out. If you’ve ever slipped on stairs, you know how helpful that can be!
There are two main types. Flush mount sits flat and blends in with the plank. Overlap nosing goes over the edge and is a bit easier to install. Both work great it just depends on your style and what’s easier for your project.
Once you know what stair nosing is, you’ll spot it on every stair you see!
Why You Need Stair Nosing for Vinyl Planks
You might be thinking, “Do I really need stair nosing?” The short answer yes, and here’s why.
First, it’s all about safety. Vinyl plank stair nosing gives your stairs more grip, which means less chance of slipping. I once took a quick step down my old stairs in socks—big mistake. After that fall, I never skipped stair nosing again.
Second, it helps protect the edge of your steps. Over time, stairs take a beating. Without stair nosing for vinyl planks, the edges can chip or lift. That’s not just annoying it can be a trip hazard too.
And let’s not forget looks. Stair nosing gives your stairs a smooth, finished edge. It pulls the whole design together, making it feel neat and polished. Honestly, stair nosing for vinyl planks is more than just looks it’s smart, simple, and gives you peace of mind.
DIY Vinyl Plank Stair Nosing – Is It Easy?
Yes, it’s easy. Really!
I was nervous the first time I tried it. But once I started, I saw it wasn’t hard at all. You don’t need to be an expert.
If you can measure, cut, and glue, you can do this. That’s all there is to it. Just take your time.
All you need are a few tools. Get your vinyl planks, stair nosing, glue, and a tape measure. A saw or knife will help with cuts.
DIY vinyl plank stair nosing is a great first project. It makes your stairs look nice. It also makes them safer. And best of all you did it yourself!
How to Install Vinyl Plank Stair Nosing (Step-by-Step)
This part sounds tricky, but it’s not. If you can measure, cut, and press things into place, you can do this job. I promise. Let’s break it down into five easy steps.
Step 1: Measure and Plan
Start by measuring each stair. Write down the size. Double-check your work. A small mistake here can throw off the whole project.
If you’re using stair nosing for vinyl plank, make sure you plan for the edge. Some nosing pieces stick out a little.
Step 2: Cut the Plank and Nosing
Next, cut your vinyl plank and stair nosing to fit each stair. A handsaw or a sharp knife works fine. Take your time. Make sure each piece fits before moving on.
Flush mount nosing sits flat with the stair. Overlap nosing hangs over the edge a bit. Pick the one you like best.
Step 3: Add Adhesive or Screws
You can glue the pieces or screw them in. I like using glue—it’s quick and clean. Pick one made for vinyl planks.
Put glue on the back edge of the plank and under the stair nosing. If you use screws, drill small holes first. That stops the vinyl from cracking.
Step 4: Press in Place
Now press the nosing down. Use your hands or a rubber mallet. It should feel snug and strong.
If you’re using screws, screw them in slowly. Don’t go too tight.
Step 5: Let It Dry
Last step wait. Let the glue dry for at least 24 hours. Don’t walk on the stairs during this time.
That’s it! You now know how to install vinyl plank stair nosing. It’s safe, it looks great, and you did it all yourself.
How to Make Stair Nosing from Vinyl Plank
Let me tell you nothing’s more frustrating than buying the perfect vinyl planks and realizing the store doesn’t carry matching stair nosing. That happened to me on my second DIY project. I stood there in the aisle, holding the plank, thinking, “There has to be a way to make this work.”
Good news? There is.
If you can cut, bend, and glue, you can make your own stair nosing from vinyl plank. It takes a little patience, but it saves money and matches your floor perfectly. Here’s how I did it and how you can too.
Step 1: Score and Snap
Start by cutting your vinyl plank. You don’t need fancy tools just a utility knife and a straight edge. Score the top side a few times, then snap it clean. This makes the piece small enough to shape into your stair nosing.
Step 2: Bend the Edge
Now here’s the fun part bending the plank. If your vinyl is flexible, you can score the back side and gently bend the edge. Go slow. Some planks bend easier than others.
Want a cleaner bend? Use a heat gun or hair dryer. Just a little warmth helps the vinyl soften up. Don’t overdo it you want it soft, not melted.
Step 3: Add Support
To make it stronger, glue a support piece underneath. A scrap strip of vinyl or even a wood trim can work. This helps your DIY vinyl plank stair nosing stay solid and safe over time.
Step 4: Test and Trim
Hold it against the stair. Check the fit. Trim a little more if needed. This is where your patience pays off. A snug fit makes a big difference in both safety and looks.
Step 5: Glue It Down
When it fits just right, add your adhesive. Use one made for vinyl. Press it into place and let it cure for a full day. I like to tape it down while it dries to make sure it stays put.
That’s it! You’ve just learned how to make stair nosing from vinyl plank and it’s easier than you think.
I’ve made a few of these now, and every time, I’m amazed at how custom it looks. No one ever guesses it’s homemade. And the best part? It matches perfectly with the rest of the stairs.
Whether you’re doing a full staircase or just fixing one step, stair nosing for vinyl plank doesn’t have to be store-bought. With a little care, you can create your own and feel proud every time you walk up and down your stairs.
Pro Tips for a Smooth Finish
You’ve done the hard part. Now let’s make it look even better.
These tips will help you get a clean, pro look. They’re simple, but they make a big difference.
1. Cut Straight and Slow
Use a sharp blade or fine saw. Take your time. A clean cut makes your stairs look neat. Messy edges are hard to hide.
2. Always Test Fit First
Before using glue, test each piece. Put it in place. Make sure it fits right. You can still trim if needed. This step saves time later.
3. Use Painter’s Tape for Clean Lines
Glue can get messy. Painter’s tape helps you keep it neat. Tape the edge before you glue. After you’re done, peel it off. The line will be clean.
4. Add Corner Guards for Busy Homes
Kids, pets, and guests can wear down stair edges fast. Use clear guards or metal trims. They keep your vinyl plank stair nosing safe and strong.
5. Let It Dry All the Way
Glue needs time to dry. Don’t walk on the stairs for at least 24 hours. I made that mistake once and had to fix it all. Wait. It’s worth it.
6. Do a Quick Touch-Up
When it’s dry, wipe off glue. Fill gaps with caulk. This small step makes your stairs look smoothand finished.These tips are easy to follow and make a big impact.
Vinyl plank stair nosing looks best when done with care. Little things matter. Take your time, and you’ll be proud of the result.
Common Mistakes to Avoid
Let’s be real I’ve made a few of these mistakes myself. That’s why I’m here, sharing them with you. If I can help you avoid even one of these, this section is doing its job.
1. Skipping the Measuring Step
I made this mistake once. I cut all the nosing pieces at once without checking the size of each stair. Big mistake. My bottom stair was wider than the others. I had to redo everything. When you’re working with vinyl plank stair nosing, always measure each stair. Then measure again. Even small changes matter. This step saves you time, money, and stress.
2. Using the Wrong Adhesive
Not all glue is made the same. I used leftover wood glue once. Bad idea. The nosing lifted the next day. If you’re using stair nosing for vinyl plank, pick an adhesive that’s made for vinyl or multi-surface floors. It will hold better and last longer. Always read the label before you buy.
3. Not Letting It Dry Long Enough
I get it it’s hard to wait. But don’t step on the stairs while the glue dries. I did that once, and the nosing slid out of place. I had to pull it off and start over. When doing DIY vinyl plank stair nosing, give it a full 24 hours to set. Patience really does pay off.
4. Forgetting to Test Fit
I used to think I could just cut and stick. Nope. You should always test-fit the nosing first. Put it in place before adding glue. It’s the same for both store-bought and DIY stair nosing for vinyl planks. You might need to trim a little more, and it’s easier to fix before things get sticky.
5. Not Cleaning the Surface First
This one’s easy to miss. But dust, dirt, and tiny scraps can mess up the glue. Before you stick down the vinyl plank stair nosing, wipe the stair clean. A damp cloth works fine. This quick step makes sure the glue sticks tight and holds strong.
6. Overlooking the Type of Stair Nosing
Flush mount or overlap? It’s not just about style. It’s about fit. I once used flush nosing on stairs that weren’t level. It didn’t sit flat. Overlap nosing can hide small flaws and is easier for beginners. When you’re picking stair nosing for vinyl planks, think about what works best for your stairs and your skills.
Mistakes happen. They’re part of learning. But when you know what to avoid, you get better results, faster. Whether you’re figuring out how to install vinyl plank stair nosing or how to make stair nosing for vinyl plank, a little planning goes a long way.
Conclusion
And that’s it! Now you know all about vinyl plank stair nosing. It may seem like a big job at first, but trust me it’s not. If I can do it, so can you.
Installing stair nosing for vinyl planks makes your stairs safe and sharp. It stops slips. It keeps the edges strong. And let’s be real it just looks nice.
If your store doesn’t have the right match, no stress. You can learn how to make stair nosing from vinyl plank at home. I did it. You can too. It fits better and costs less.
DIY vinyl plank stair nosing is a fun first project. It teaches you a lot. And when you’re done, you’ll feel proud every time you use the stairs.
So take your time. Follow the steps. If you’re still not sure, come back to this guide. Or send it to a friend who needs help. We all start somewhere.
Now go make those stairs safe and stylish. You’ve got this!
FAQs About Vinyl Plank Stair Nosing
1. What is vinyl plank stair nosing?
Vinyl plank stair nosing is a trim piece that covers the front edge of each stair. It gives stairs a smooth, finished look while also improving grip and preventing wear or damage.
2. Do I really need stair nosing for vinyl planks?
Yes. Stair nosing makes your stairs safer by adding grip, prevents the edges from chipping, and gives your staircase a clean, finished look.
3. Can I install vinyl plank stair nosing myself?
Yes, you can! Installing vinyl plank stair nosing is a beginner-friendly DIY project. If you can measure, cut, and glue, you can do it with ease.
4. What tools do I need to install stair nosing?
You’ll need vinyl planks, stair nosing, adhesive or screws, a measuring tape, and a saw or utility knife. These basic tools are enough to complete the job.
5. How do I make my own stair nosing from vinyl plank?
To make your own stair nosing, cut and bend a vinyl plank, add a support piece underneath, and glue it in place. It’s a simple DIY that saves money and matches your flooring perfectly.
1 Comments
We write rarely, but only the best content.

admin
best blog i have seen so far